|
|
How to Make a Gigantic Roll of Film
|
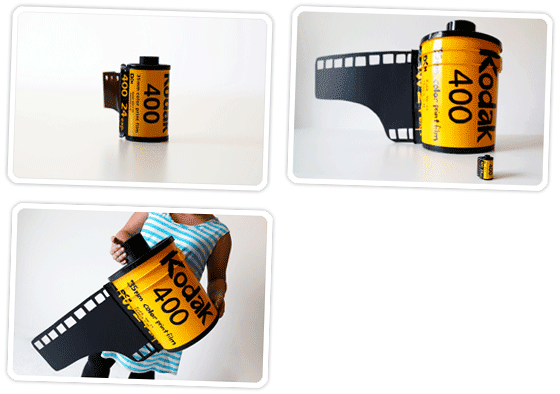
Extra photos for bloggers: 1, 2, 3
|
Film lovers unite!
This tutorial will give you the power to recreate a tiny 35mm film canister into a larger-than-life reminder of the good ol’ days.
Use it as a prop for photos, store unused rolls of film and other camera related goodies, or just make yourself feel really small!
This film canister will hold more than you ever thought could fit onto a 24-exposure roll.
Make a Giant Roll of Film!
p.s. Win an Instax Camera on Photojojo’s Pinterest today! Follow us & see how to enter at Brit & Co’s blog.
p.p.s. Photojojo’s seeking the world’s best web designer! Learn more.
Why it’s cool:
 Imagine what kind of photographs you could make if this was an actual roll of film.
Talk about the big picture!
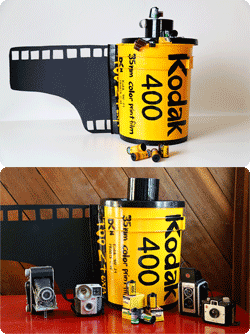
Leave the handle on it and use it to transport props to and from your photo shoots.
Or use it as a prop in an Alice in WonderCameraland scenario.
It can be an awesome way to organize your photos or store your film and batteries. Camera bags, lenses, harddrives…you can fit it all into this 35mm container.
No matter what you put inside, this is one roll of film that’s pretty darn functional. Ingredients:
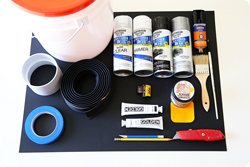
Get these at the Hardware Store:- 5-Gallon Paint Bucket with Lid
- 4″ PVC pipe
- 9′ Rubber Garage Door Bottom
- Spray Paint: black, silver, primer, and clear gloss
- Blue Painter’s Tape
- Yellow-gold Interior Paint
- Clamps
- 5 minute Epoxy or Gorilla Glue
- Dropcloth or Tarp
Get these at the Craft Store: - Acrylic Paint: Black and White
- Paint Brushes: big and small
- Black Poster Board
- Xacto knife
- Pencil
- Your favorite Roll of Film
- Stencil Letters (optional)
- Magic Wand (optional)
STEP 1: Prep
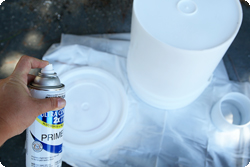 First, prep all your surfaces.
Remove the handle from the bucket. Lay the bucket, lid, and PVC pipe outside on a tarp.
Give it a good coat of primer. This will make the painting steps easier, an ensure your paint will bond with the plastic surface.
Let it dry completely.
TIP: When picking out spray paint, make sure you choose one that will adhere to plastic. Most will say this on the bottle. Step 2: Paint the Canister:
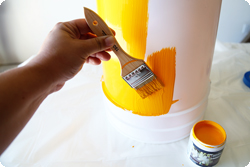 Use your magic wand large brush and put a coat of yellow-gold paint on the entire bucket.
Once dry, put a second coat on for a more even and consistent look.
TIP: Take your roll of film with you to the paint supply store. We found a paint chip that was almost identical to the color of our film canister. The 8-ounce sample size was just the right amount of paint for this project. Step 3: Paint the lid:
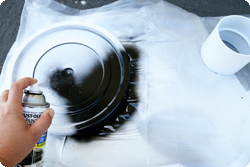 While you’re waiting for the canister to dry, coat the bucket, lid and PVC pipe with a solid layer of black spray paint.
This will become the top portion of the film canister and film spool.
Let it dry. Check back and see if you need a second coat. Step 4: Glue side piece:
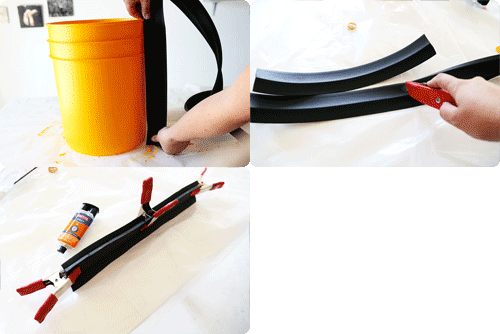 Recreate the side tab that allows the film to move in and out of the canister.
We found a rubber garage door bottom to be easiest to work with. You should be able to find this at your local hardware store.
Measure the length of the bucket, and cut two pieces of equal lengths.
Use epoxy to glue the pieces together, back to back, with the short and long edges mirroring each other.
Use clamps to hold the pieces tight while the epoxy cures. This epoxy takes about 5 minutes to fully cure. Step 5: Attach side panel:
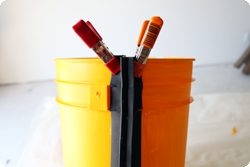 Once the two pieces of weather stripping have been sealed together, attach them to your main film canister bucket.
There are two sides to your strip. One has a longer, sloping side. The other is short and more squared off. Place the long slope against the bucket for a gradual transition between the materials.
Using epoxy on the longer side, press it into place against the bucket. Clamp the ends to the bucket to add pressure while the epoxy is curing.
TIP: Cut two slits in the weather stripping to allow it to fit tighter over the grooves on the bucket.Step 6: Paint Side Strip:
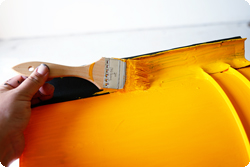 When the epoxy is dry, remove the clamps and paint the outer edges with the yellow/gold paint to blend it with the main canister.
TIP: You may need three coats to cover up the dark black of the weather stripping. Step 7: Attach Top of Spool:
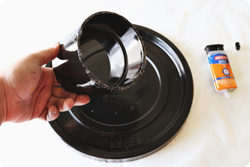 Center the painted PVC pipe on the bucket lid.
Use epoxy to attach these two pieces together.
When it has dried, put the lid on the bucket. It’s starting to come together now.Step 8: Paint the bottom:
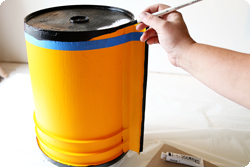 Measure the amount of black edge on the lid.
Use blue tape to mask off the same amount of space on the bottom of the canister.
Paint the bottom black to recreate the bottom of the roll of film.Step 9: Add Details:
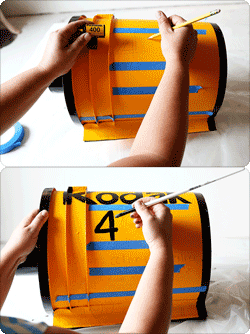 Now it’s time to put on the finishing touches. Accuracy can be great, but don’t be afraid to make your film unique.
Stencil letters, or hand draw them with pencil. Paint on all your film markings using acrylic paint.
Don’t forget about the silver codes on the back side.Step 10: Clear Coat
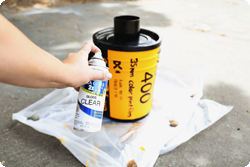 Once you are sure everything is dry, take your film back outside to your tarp.
Give it a coat of clear gloss to protect it and add some sheen.Step 11: Cut your Film
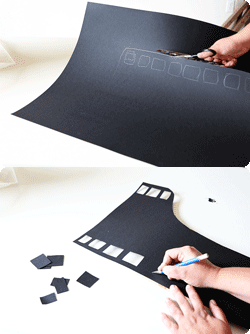 The last detail this canister needs is a piece of film. Use your pencil and Xacto to cut out squares on the top and bottom of the film tongue.
Put a little glue on the end, and slide it into the slot between your two weather strip pieces.Step 12: Display:
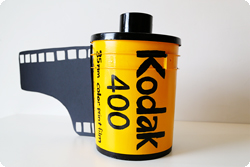 TA-DA!
Just like that, you’ve turned a tiny roll of film into a gigantic one! Take it further
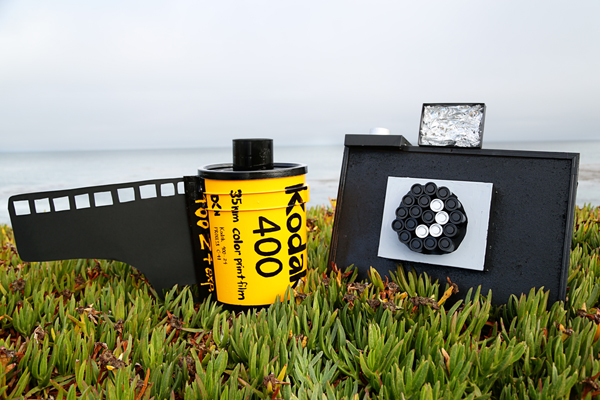
Thanks to Katie Elizabeth Photography for this amazing project idea! Check out her photostream.
|
|